It’s taken me several tries, but I’ve finally found the dinner roll recipe I’m going to go with. It’s drop-dead simple, doesn’t require any special ingredients, doesn’t need to be sliced, and doesn’t require that bane of my existence: the slash in the top.
If that last piece doesn’t make any sense to you, think about the slice (or slices) in the top of most large bread loaves. No, not sandwich bread. I mean a nice crusty loaf, the kind you serve with a fancy dinner. You slice the dough after it’s risen, but before baking, so that it will rise more in the oven. And Every. Single. Time. I do it, I end up deflating the dough.
I’ve gotten a few tips on how to get it right, but I’d love to hear any other ideas you’ve got down in the comments.
Ingredients
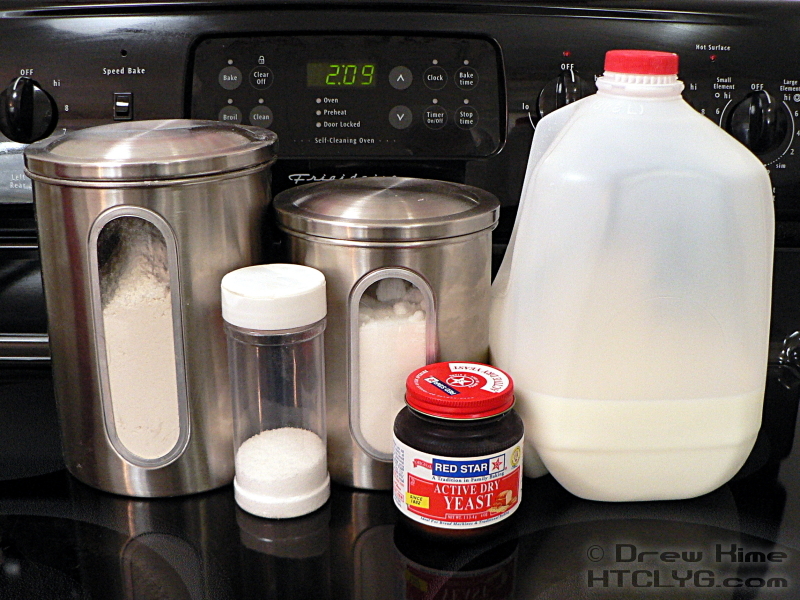
3½ cups white flour
1½ teaspoons salt
1 teaspoon sugar
2 tablespoons active dry yeast (or one packet)
½ cup lukewarm milk
¾ cup lukewarm water
Directions
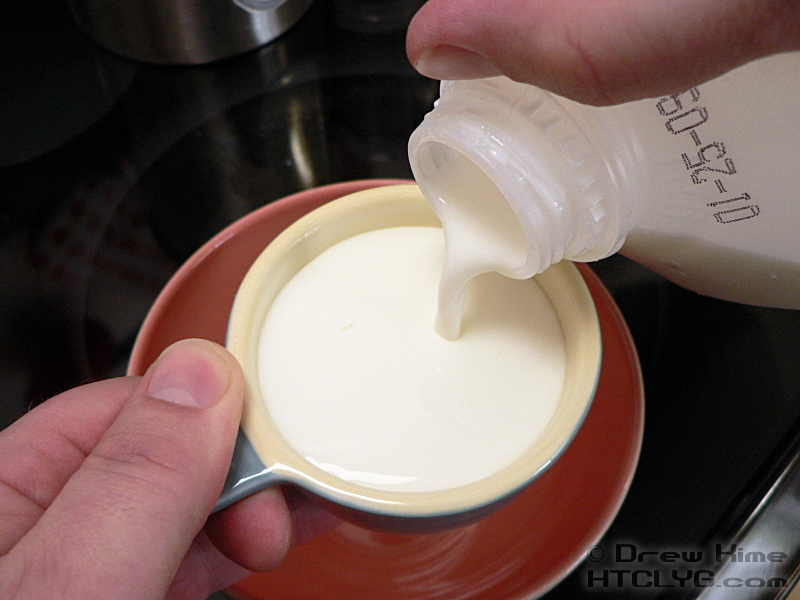
The milk needs to be lukewarm before adding the yeast, so measure it out into a bowl and warm it in the microwave for about 30 seconds. Just enough that it feels slightly warm to the touch. (105°-115°F) Then stir in the yeast.

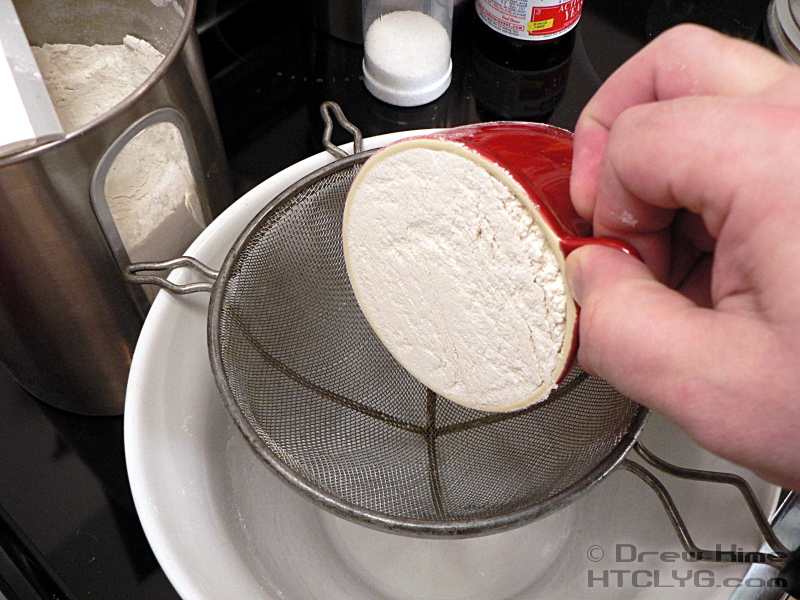
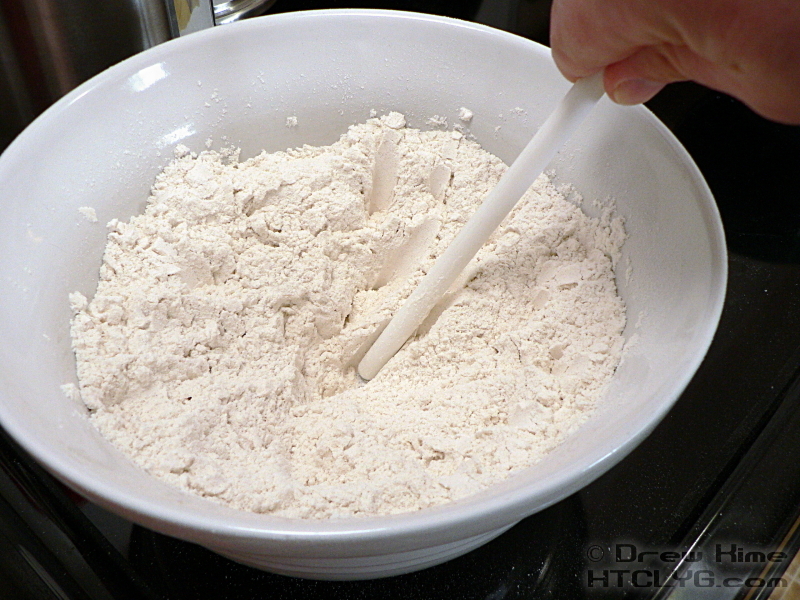
While the yeast is dissolving, sift the dry ingredients together.
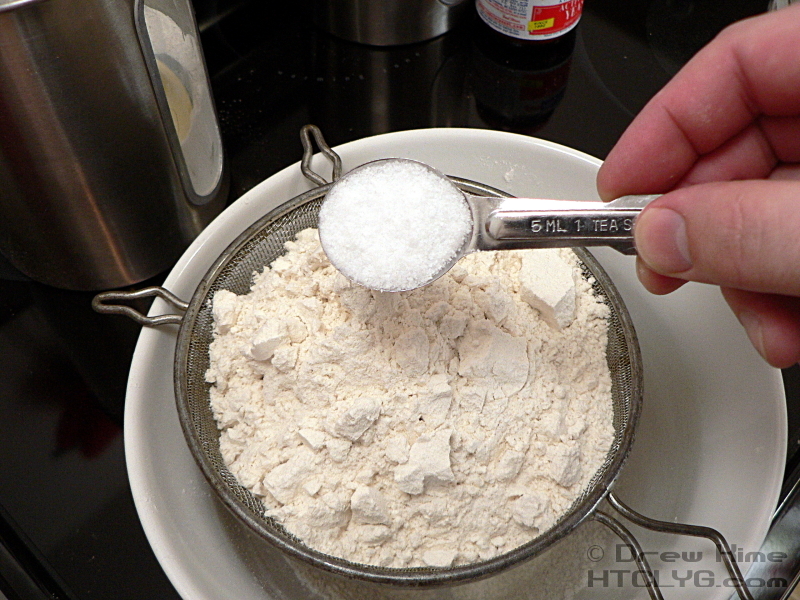

Stir the dry ingredients to distribute the salt evenly. If you leave it all in the center, the salt can kill the yeast before it has a chance to rise. Then make a well in the center.
Once the yeast starts bubbling in the milk, pour it into the well in the dry ingredients. Pull a little flour from the edges over the top of the milk, but don’t stir it in.
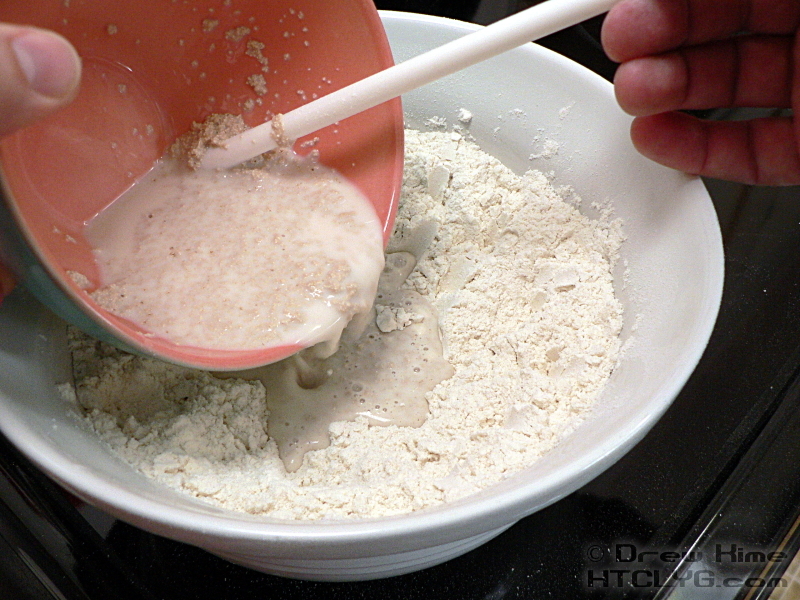

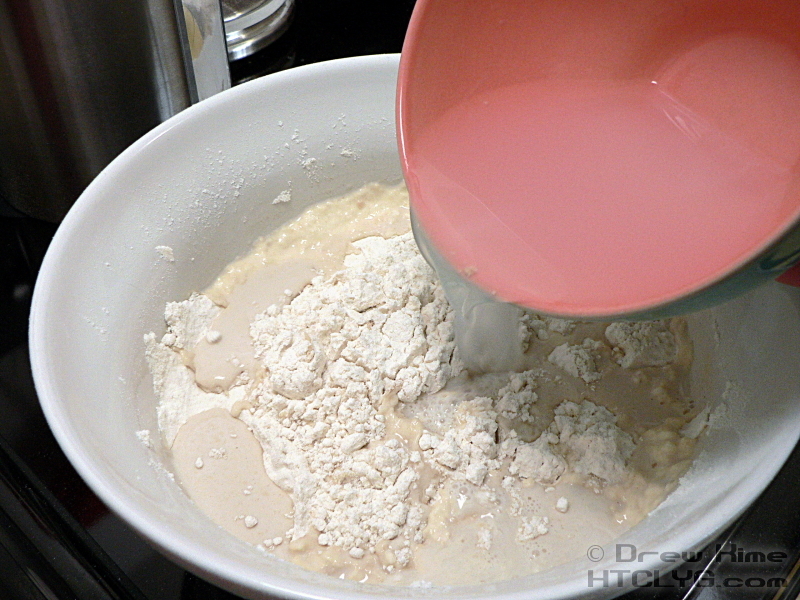
In about 10-15 minutes you should see bubbles starting to form in the flour. That means the yeast is active and starting to eat the sugar and ferment the milk. Add the warm water and stir everything together to form a loose dough. (The water looks cloudy because I put it in the bowl I had used for the milk and yeast. No point in washing good yeast down the drain.)

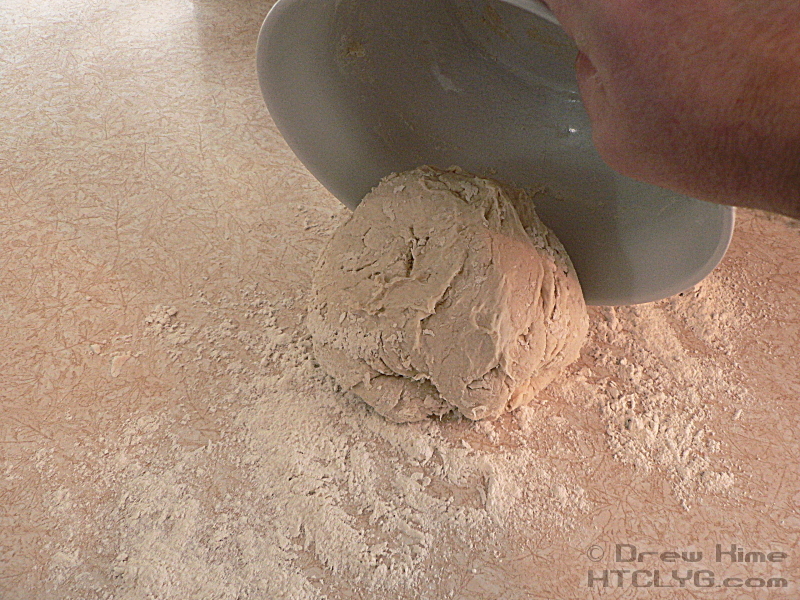
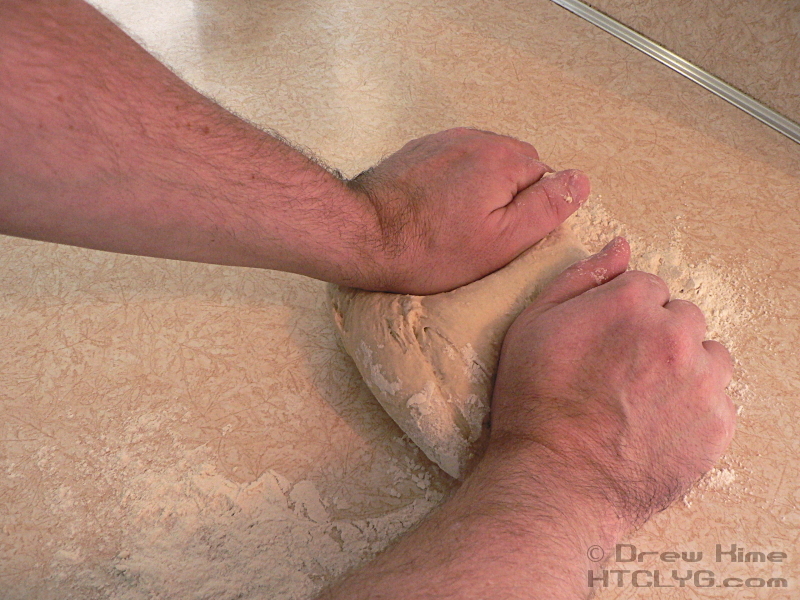
Turn the dough out onto a floured surface and knead for 8-10 minutes, until it is smooth and elastic. The more you stretch it, the more you will develop the gluten, the long strands of protein that give bread its spongy volume.
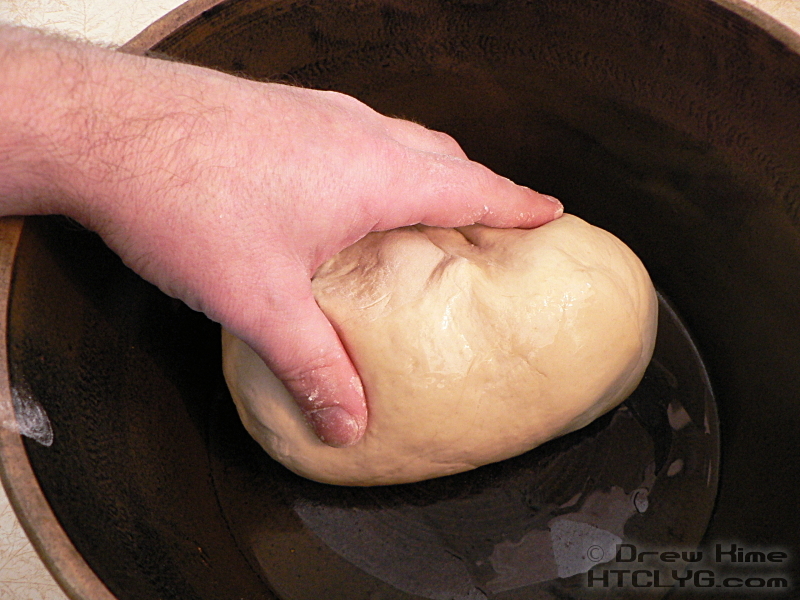
Put a few tablespoons of oil in Great-Grandma Winnifred’s bread bowl. Oh, you don’t have that? Okay, any large bowl should do. Roll the dough in the oil so it is completely covered, then cover the dough with a piece of plastic wrap.
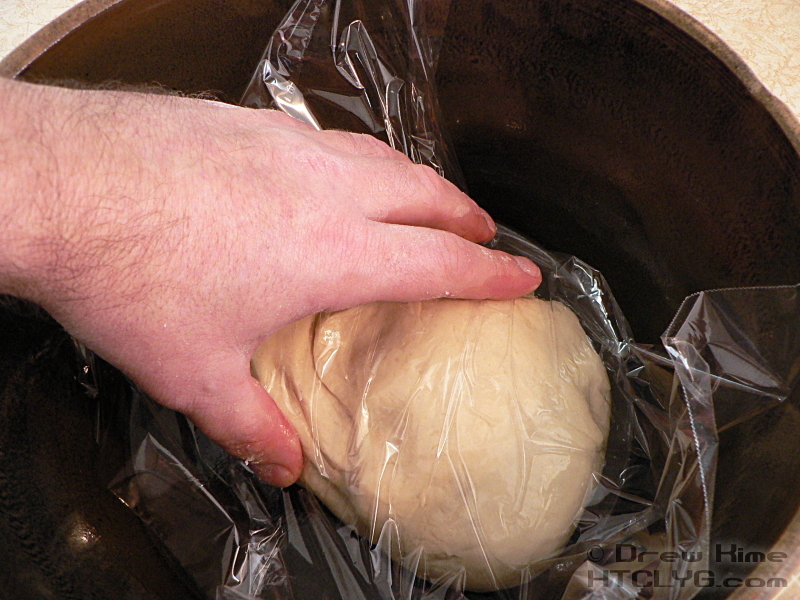
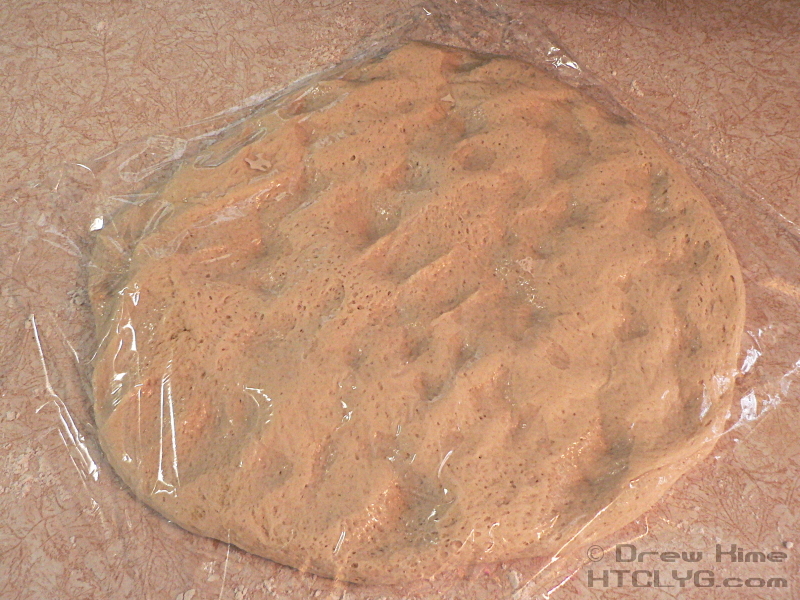
Set the dough someplace warm to rise for about an hour-and-a-half, until it has doubled in size.
Imagine I didn’t forget to take that picture, and you see a picture of risen dough here.
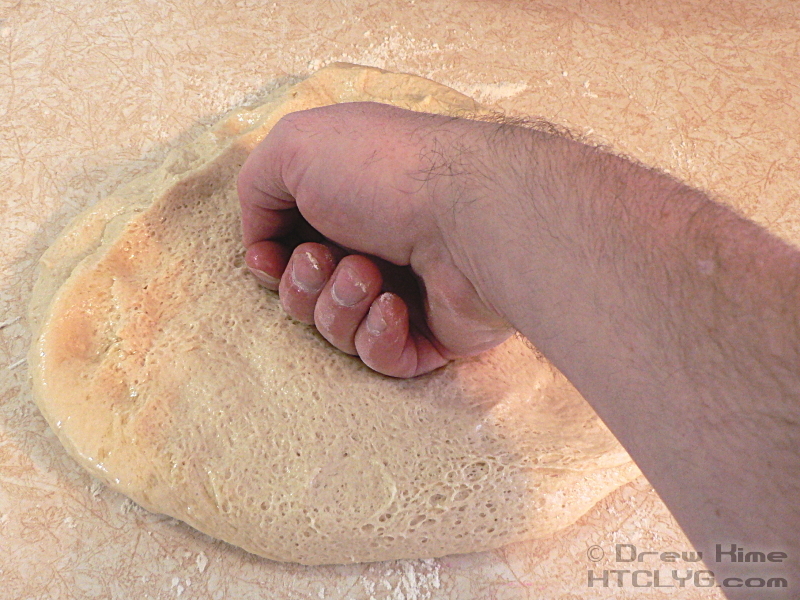
Turn the risen dough out onto your floured surface and punch it down to deflate it. Cover it again with the plastic, which should still have the oil on it from the first rising.
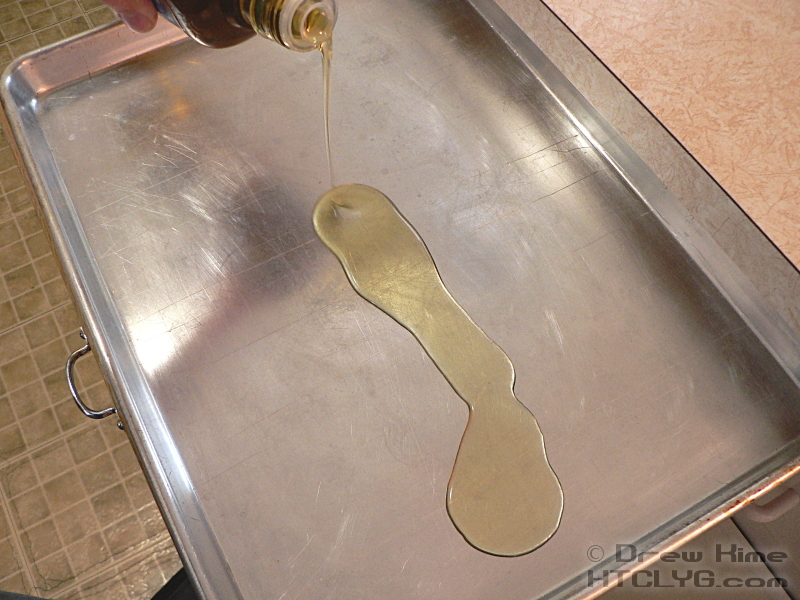
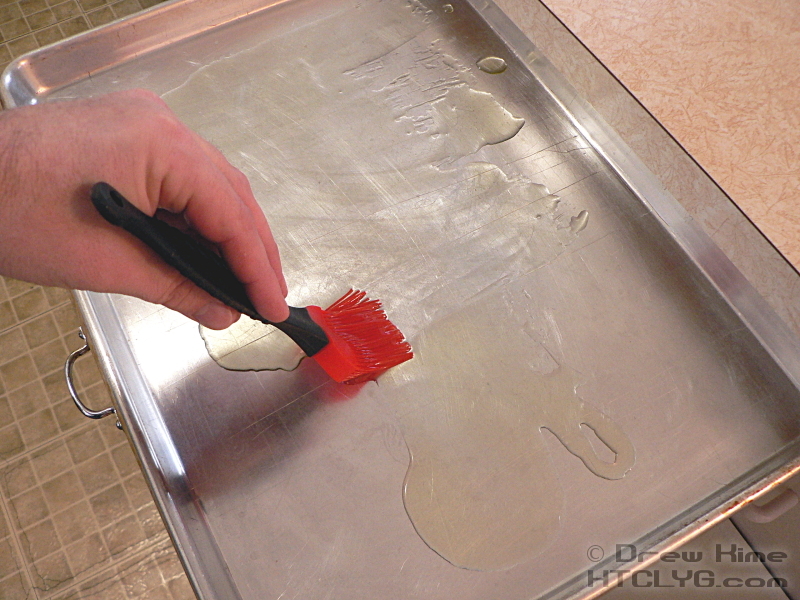
Oil a baking sheet.
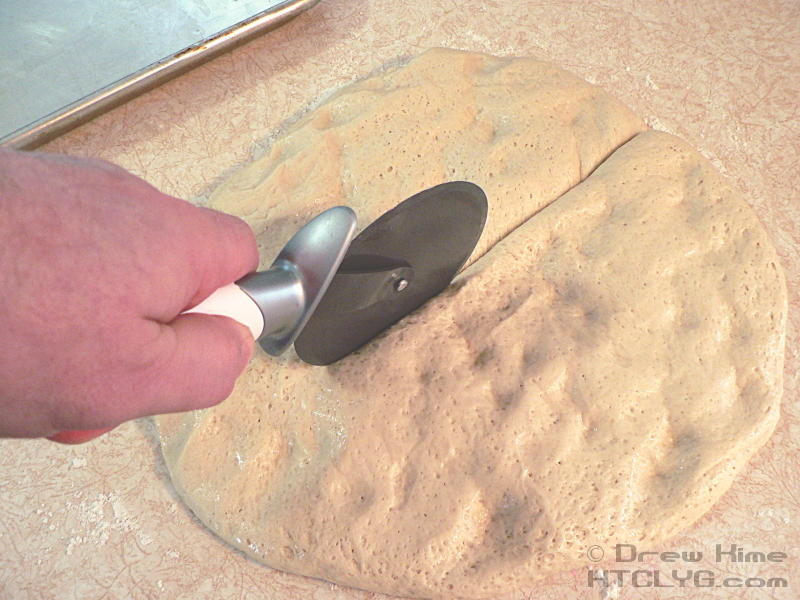
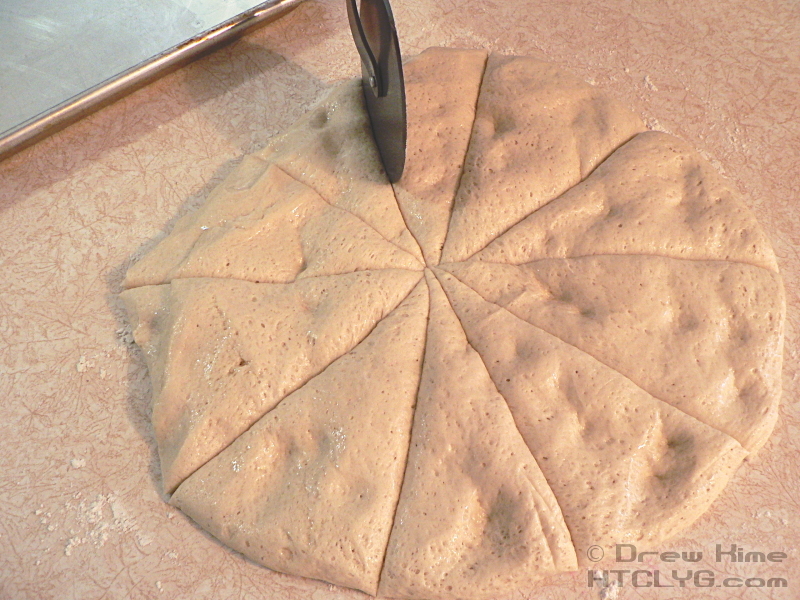
Once the dough has rested for about 10 minutes, cut the dough into 10 equal pieces. If you’re not an experienced pizza cutter — which I obviously am not — and the pieces aren’t even, feel free to divide some of the larger pieces and add it to the smaller ones.
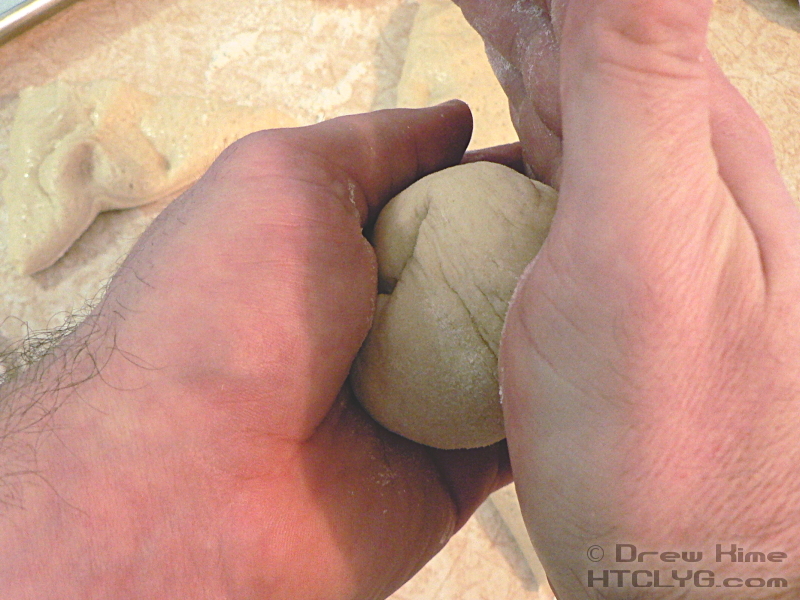
Roll each piece of dough between your palms until it is a rough oval.
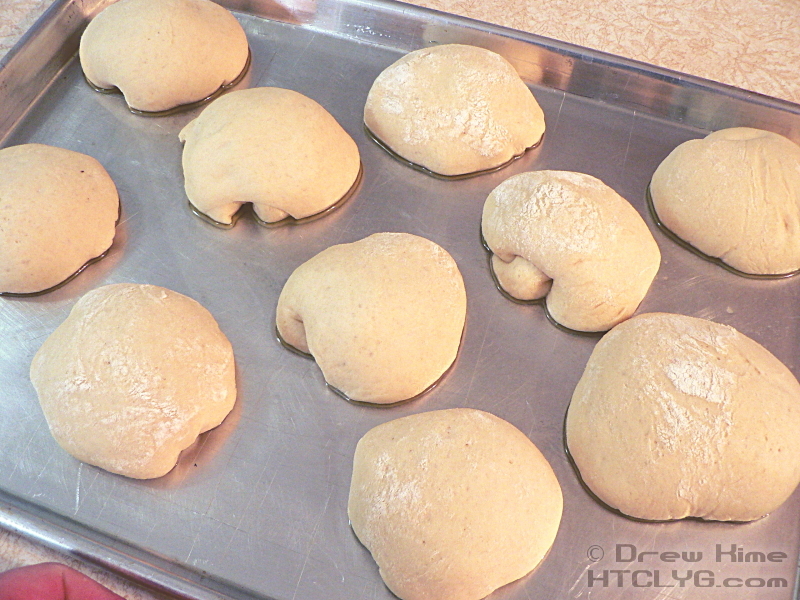
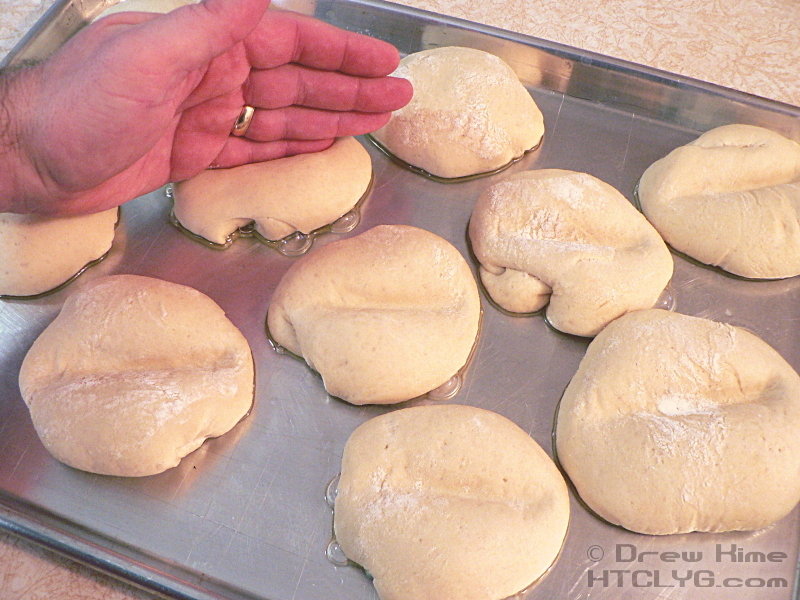
Set them on the oiled baking sheet, with as much room between them as possible. Leave the pan in a warm place to rise again for about a half hour. When it’s almost ready, pre-heat the oven to 450°.
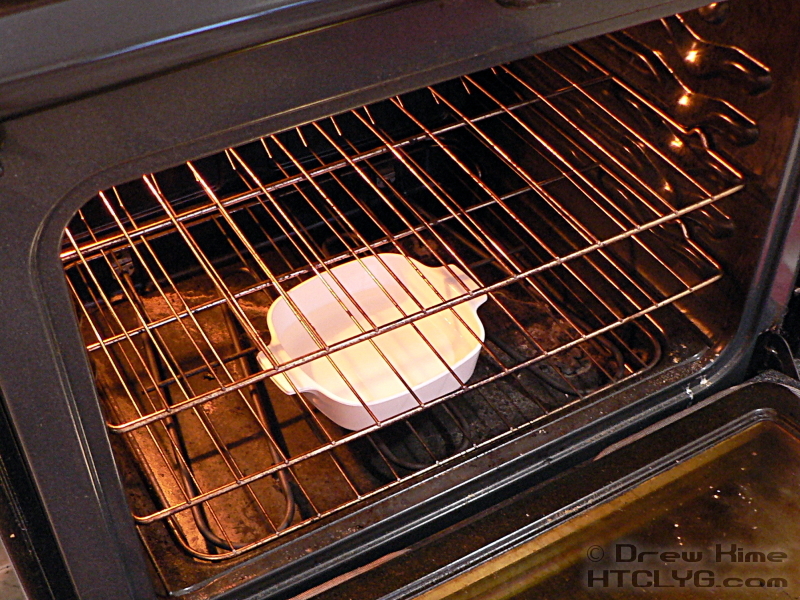
Place a shallow baking dish half-filled with water on the lowest rack in your oven before turning it on. The steam from the water will make the crust of the rolls … crustier.
When the dough has doubled in size, press down with the side of your hand along the long direction of each roll.
Bake on the middle rack at 450° until the tops are golden brown, about 10-15 minutes.
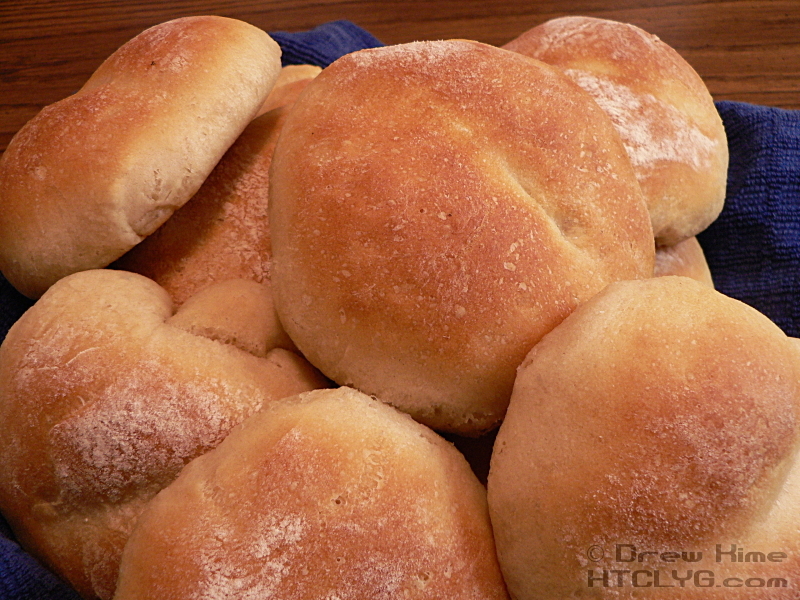
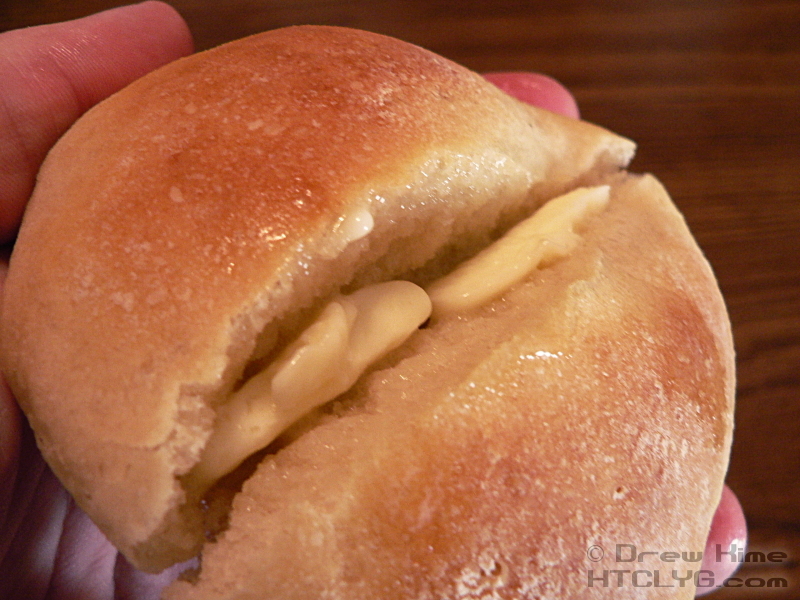
Serve hot from the oven with butter.
And that’s it.

Ingredients
- 3½ cups white flour
- 1½ teaspoons salt
- 1 teaspoon sugar
- 2 tablespoons active dry yeast (or one packet)
- ½ cup lukewarm milk
- ¾ cup lukewarm water
Instructions
Warm the milk until warm to the touch -- 105°-115°F -- then stir in the yeast. While the yeast dissolves, sift together all the dry ingredients in a large mixing bowl. When the yeast starts bubbling -- about 5-10 minutes -- pour that and the water into the dry ingredients.
Stir until it forms a loose dough, then turn out onto a floured surface. Knead for about 10 minutes, until the dough is smooth and satiny. Place in an oiled bowl, cover with plastic wrap, and place somewhere war to rise until doubled in size.
Coat a baking sheet with oil or corn meal. Turn the dough out onto a floured surface and punch down. Divide into 8-12 even pieces. Roll each piece into a blunt oval and place on the baking sheet, well spaced out. Place somewhere warm to rise until doubled in size.
Preheat the oven to 450°F. Press a crease into each roll with the side of your hand. Bake on the middle rack at 450° until the tops are golden brown, about 10-15 minutes.


