Pie crusts aren’t all that hard to make, but they can be a bit time consuming. So if you’re already busy with a big meal, it’s tempting to just get a pre-made crust and add some filling.
With this trick, you can easily do the crust a day or more ahead of time. You’ll save lots of time on cleanup, too.
Ingredients
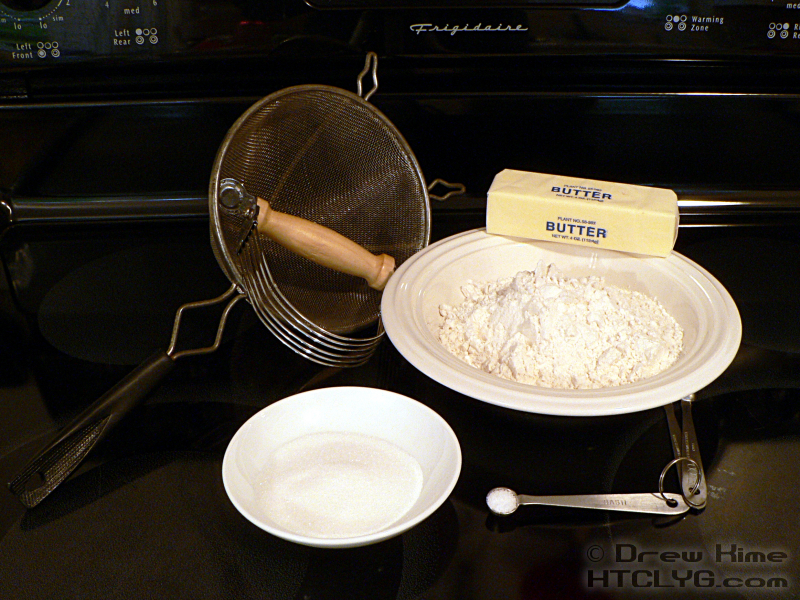 1 1/3 cups flour
1½ tablespoons sugar
¼ pound (one stick, eight tablespoons, ½ cup) butter
1 dash salt
3 tablespoons cold water
Directions
Sift the flour, sugar and salt together.
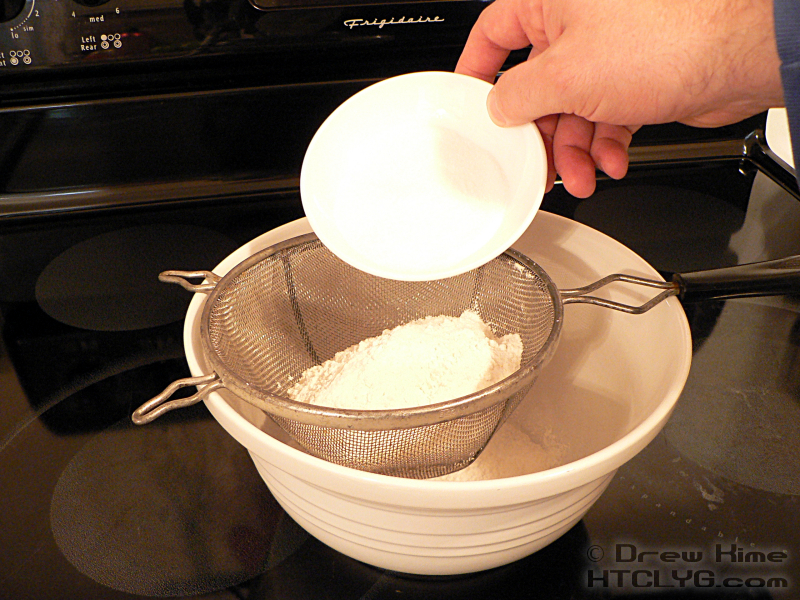
Don’t know what “sifting” is? Watch this quick video.
Oh, and how much is a “dash” of salt? I’m not sure, I just use the measuring spoon.

(Okay, it’s about a quarter-teaspoon. If you’ve got “normal” measuring spoons you’ll have that one.)
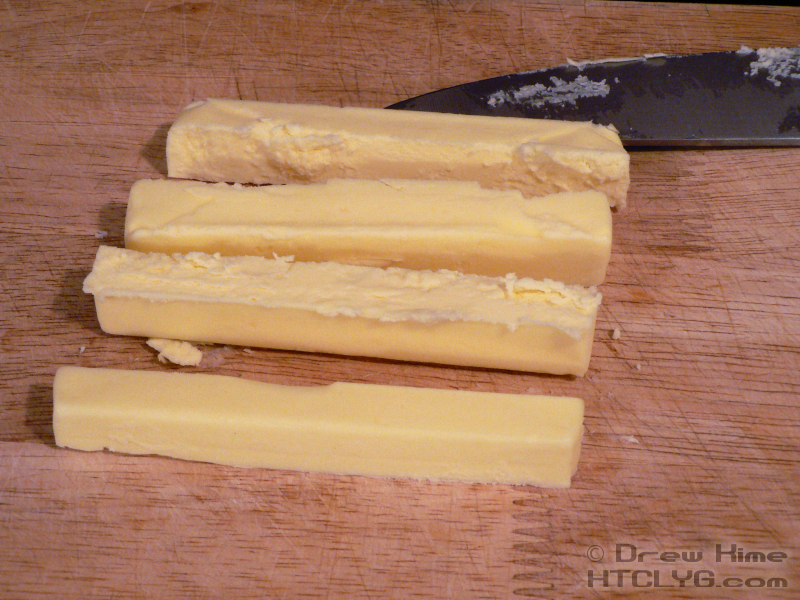
Now cut the butter into small chunks. Make sure it’s nice and cold or it will stick to your knife.
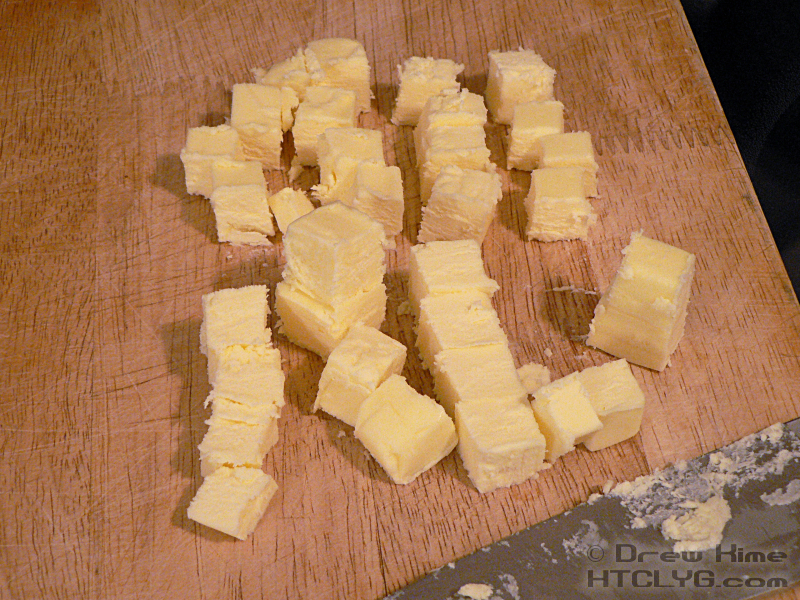
This next step is much easier if you have a pastry cutter. If not, you can make do with a pair of butter knives. Cut the butter into the flour and sugar until coarse crumbs form.
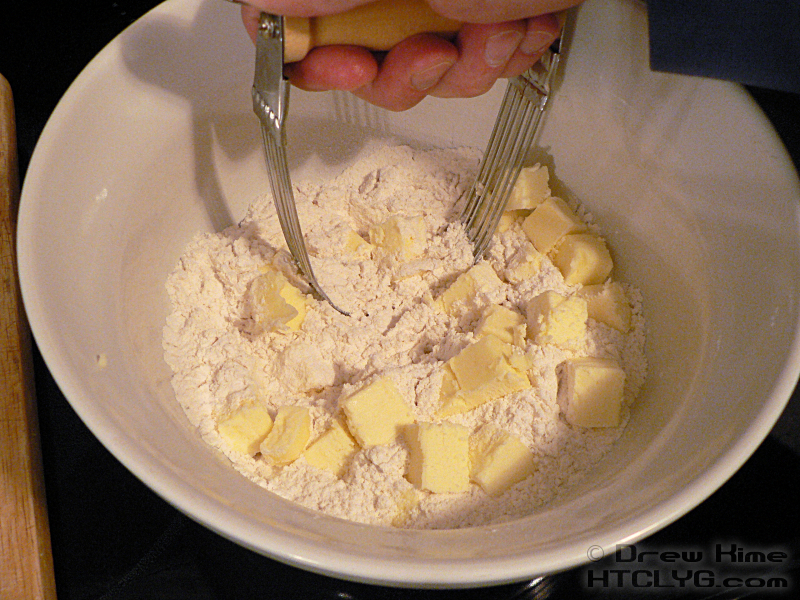
If you don’t have a pastry cutter and want to get one, get the kind with blades like in the link above. Don’t get the wire kind that I used in the photo. Cold, hard butter pushes the wires to the side, and you want the butter to be cold and hard for this.
Don’t overwork it or let the butter get too warm. You should have little lumps of butter coated in flour and sugar. These bits of butter will flatten out when you roll it, leaving little pockets when cooked. This is what gives pastry its light, flaky texture. If the butter melts, you’ll end up with the consistency of al dente pasta.

Add the cold water and quickly form it into a dough. If the butter has gotten warm by this time, or if it’s especially warm in your kitchen, you might want to put the flour/butter mixture in the freezer for 10-15 minutes before adding the water and making the dough.
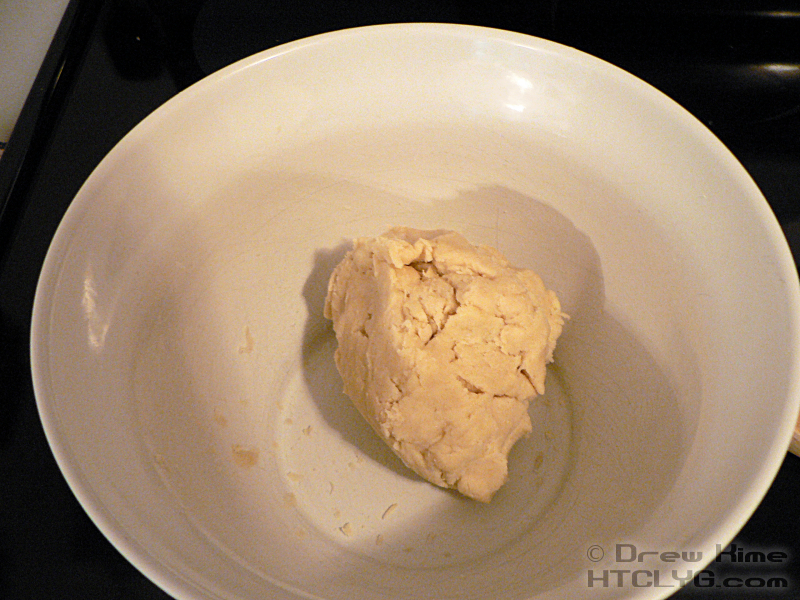
Once you’ve made the dough, transfer it to a one gallon zip-top bag and put in the refrigerator for at least a half-hour. You need this time for the water to soak into the flour. Otherwise it will just steam out when you bake it.
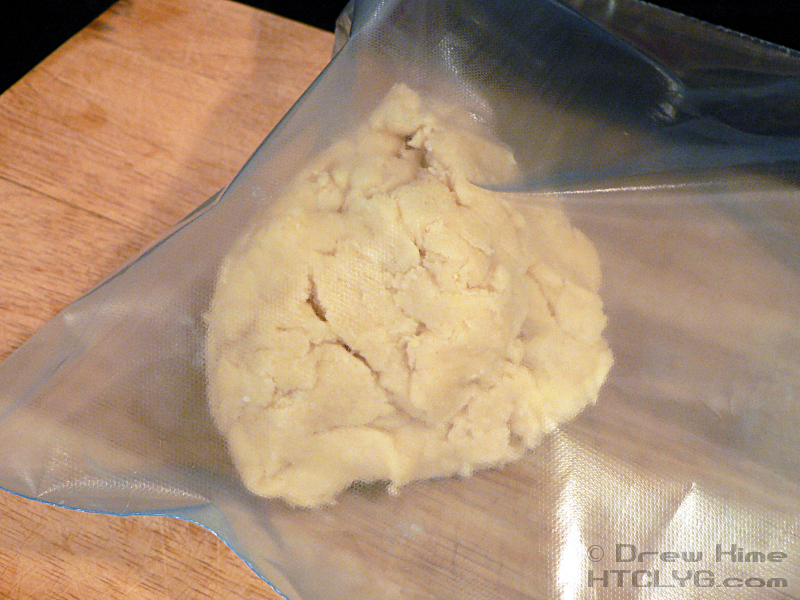
Take the dough out and roll it into a circle, still in the bag. Most one-gallon bags are just about nine inches across, which is exactly how big you want the crust to be. This also saves you from having to put flour on the table and rolling pin, and dealing with the cleanup afterwards.
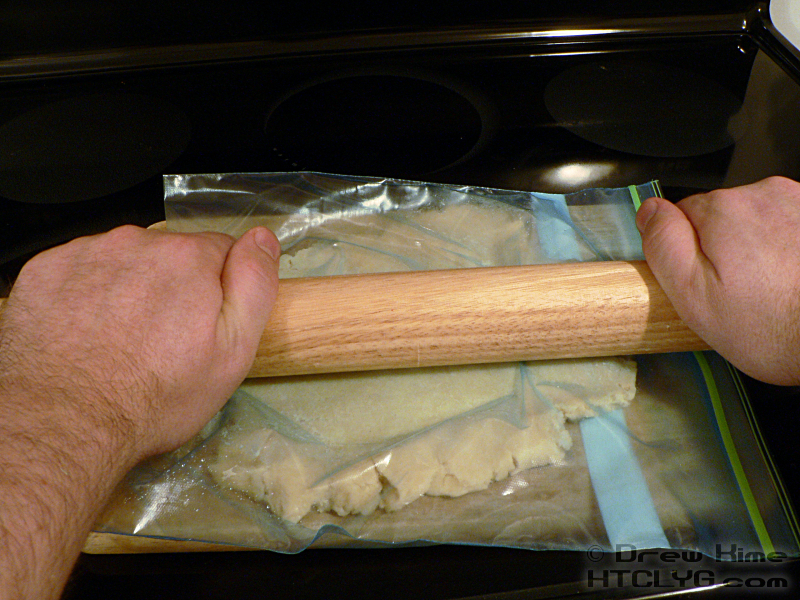
After it’s rolled out, you can put it back in the refrigerator for two to three days, or freeze it and keep for several weeks.
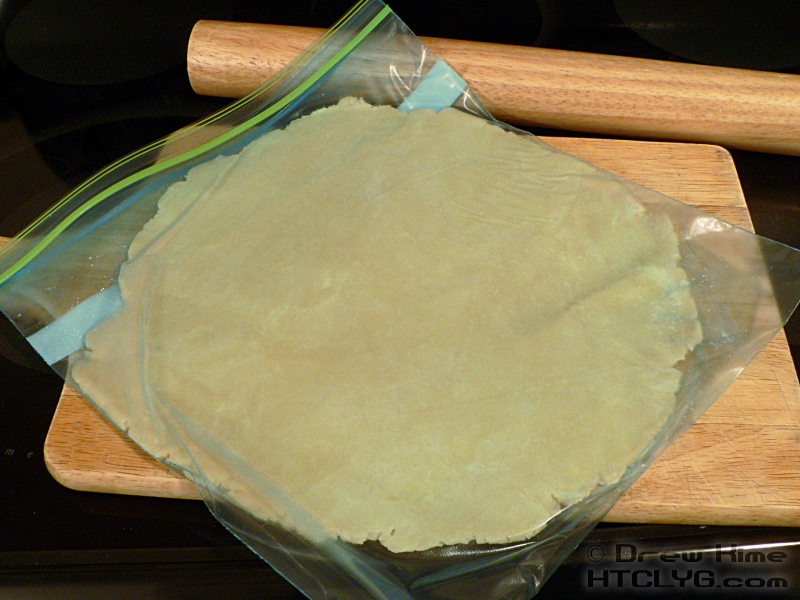
When you’re ready to use it, make sure the dough is nice and cold so it doesn’t stick to the bag. Rip the bag open along the seams and pull the crust out.
And that’s it.
One more day until you see what is made from pie crust and apples but isn’t (quite) apple pie. Subscribe via the link in the column to the right to make sure you don’t miss it. It’ll make a great finish to your Memorial Day cookout, I promise.
Ingredients
- 1 1/3 cups flour
- 1½ tablespoons sugar
- ¼ pound (one stick, eight tablespoons, ½ cup) butter
- 1 dash salt
- 3 tablespoons cold water
Instructions
Sift the flour, sugar and salt together. Cut the butter into small chunks. Make sure it’s nice and cold or it will stick to your knife. Cut the butter into the flour and sugar until coarse crumbs form.
Add the cold water and quickly form it into a dough. Transfer it to a one gallon zip-top bag and put in the refrigerator for at least a half-hour. Remove from the fridge and roll out into a circle, still in the bag.
Cut the bag open and use immediately, or return to the fridge for two to three days, or freeze for several weeks.


