I was never good at chemistry. I was fine at the book work but I was absolutely hopeless in the lab. That’s why I leave the baking to my wife. She’s great at fine-tuning a recipe and getting it just right time after time. I’m more of a seat-of-the-pants kind of cook. Taste it along the way, come out with something I like. But don’t ask me when I’m done whether it was one teaspoon of oregano or one-and-a-half.
That’s why this step-by-step lasagna recipe is going to have a couple of steps that say, “Don’t do it like this.” It still tastes great but it doesn’t look the way I wanted, and the filling is a little too close to pizza toppings. Not that there’s anything wrong with that.
Ingredients
1 lb ground beef
1 lb bulk Italian sausage (mild, hot, or half-and-half)
1 lb sliced provolone
1/2 lb shredded whole milk mozzarella
1/2 lb ricotta
1 cup grated Parmesan
1 medium onion, diced
6 cloves garlic, minced
56 oz crushed tomatoes — 2 large cans[1]
4 eggs
6 cups white flour
4 tbsp basil pesto
4 tbsp bacon fat or lard[2]
Directions
The sauce
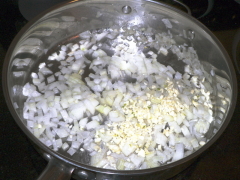
In a large non-reactive pan (ie: stainless steel or porcelain-coated iron[3]) melt 2 tablespoons of bacon fat or lard over high heat. Add half the onion and two-thirds of the garlic. If you’re bad at math, and you’re prepping as you go, that’s four cloves of garlic.
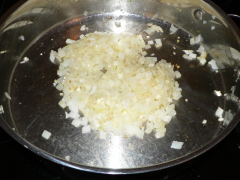
Sauté that until the onion goes a little past clear and starts to turn a little yellow. Stir it enough to keep the garlic from burning. If the garlic goes brown it gets bitter.
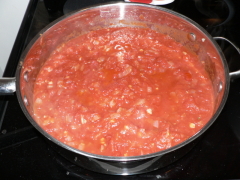
Add the tomatoes and bring to a simmer.
Add the pesto, reduce the heat, and cover.
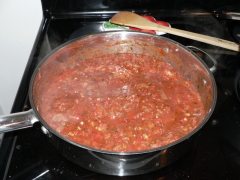
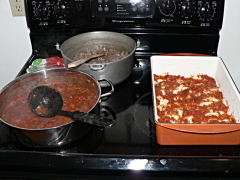
If you’re good with volumes you might think that doesn’t look like 56 ounces of tomatoes in the pictures. It’s not. I was halfway into the assembly when I realized I had accidentally cut my sauce recipe in half. Oops.
My next big step is going to be canning my own vegetables and sauces. When I do, I’m going to make this sauce by the gallon and have plenty in reserve for the next time I screw up.
The meat
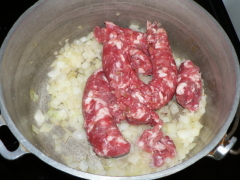
In a second large pan, sauté the rest of the onion and garlic in bacon fat. You can use your aluminum pot for this round. This won’t have any tomato. When the onion and garlic are ready, add the sausage.
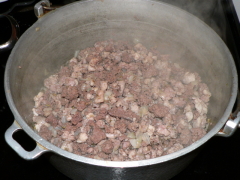
Here’s one of those “don’t do what I did” moments. When the sausage is browned, drain some of the grease. The finished lasagna didn’t taste greasy, but when I re-heated portions there was some grease on the plate.
Next, add the ground beef and cook until that is also browned. Check again if you need to drain it.
The noodles
You could use a box of pre-made lasagna noodles. If you do, I won’t tell you all the tricks: how to cook them without sticking together, how not to break them, do you really need to cook them before assembling the lasagna? Instead, I’ll tell you how to do it with fresh pasta.
Roll the noodles out to #5 on your pasta roller. (I’m assuming yours has 9 markings, like mine and the other three I’ve checked.) If you got really lucky your noodles came out exactly the same length as your lasagna pan. Since the standard roller is about four inches wide, and the standard lasagna pan is nine inches wide, you’re going to need two-and-a-half noodles for each of three layers. That’s eight noddles, with a little left over.
If you’ve got a lot of counter space you can roll out all the noodles at once. My kitchen is a little more limited so I roll them out as I assemble each layer.
The assembly
Set up a work area where you can have the tomato sauce, the meat and the lasagna pan all on the same surface.
Put just enough sauce in the pan to cover the bottom.
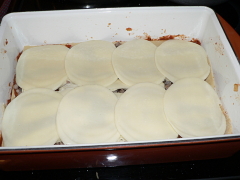
Arrange the first layer of noodles. You want the edges to overlap a little bit. This will keep everything together once it’s baked.
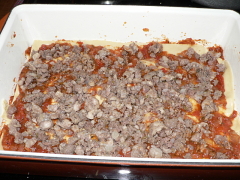
Add a layer of of sauce then a layer of the sausage/ground beef mixture.
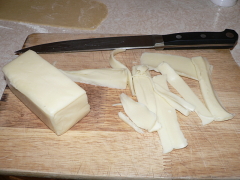
Next is a layer of cheese. This is the next “don’t do this” moment. I couldn’t find any shredded or sliced mozzarella that was made with whole milk. If I’m going to make my pasta from scratch I’m not going to use part-skim mozzarella. So I got a chunk and figured I could slice it thin enough.
I was wrong. I ended up with uneven chunks throughout each layer.
I also discovered that going with half mozzarella and half provolone, like I did, makes the filling gooey like pizza. It was still good, but wasn’t the texture most people are familiar with. You’ll get a better texture replacing half the mozzarella with ricotta.
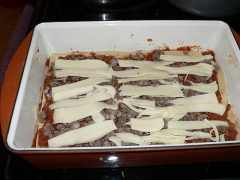
Next on the cheese layer is the provolone.
Much easier when it’s already sliced.
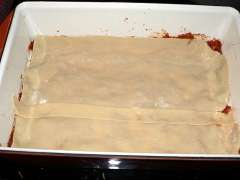
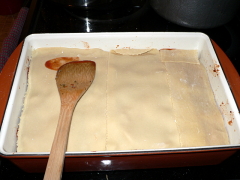
Now do another layer just like the first: noodles, sauce, meat, cheese. Then add the top layer of noodles.
I didn’t go sideways on purpose. That’s just what length my noodles came out. As long as you have good coverage with a little overlap, it doesn’t matter.
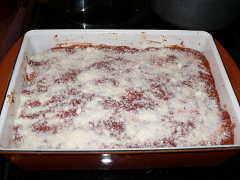
Last step in the assembly is another layer of sauce, and the Parmesan. Make sure the top layer of noodles is covered really well with sauce.
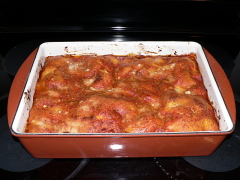
Now for the last “what not to do” tip. Cover the pan with a lid or aluminum foil, just like I didn’t. Bake it at 350 degrees for a half-hour. Uncover and bake for another five to ten minutes, until the cheese on top starts to bubble.
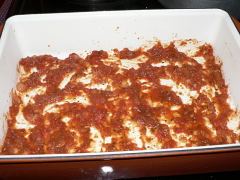
Since I didn’t cover this one, the tomato sauce completely baked into the top layer of noodles. Once again, the taste was just fine, but the top layer wasn’t as tender as the other two. Next time I make lasagna, I’ll come back and post the photos showing the difference.
PS: I lied. There’s one more “don’t do this” tip. In the second-from-last photo you can see that there’s some sauce on the side of the pan. You can see this burned on in the last photo. It’s not that hard to clean, but it doesn’t look as nice. If you’re going to bring the pan to the table and serve it there, you’ll want to wipe the sides before baking.
1. Generally I don’t recommend canned food. Most of it has so many ingredients besides what you’re looking for that you can’t control what you’re actually cooking with. Fortunately tomatoes are such a staple item that there are plenty of options without going to a specialty store. Just check the ingredients before you buy. If it has anything other than tomatoes, tomato paste and water, keep looking.
2. You do filter and keep the fat after cooking bacon, don’t you? It’s much better for pan-frying food than either butter or vegetable oils. If you don’t have any (yet) lard is a good second choice. It’s just as good for frying, but I don’t like spending money on lard when I get the bacon fat for free.
3. You don’t want to cook something as acidic as tomatoes in a pan that will react with the acid. Even though the science is pretty clear that you won’t get Alzheimer’s disease from cooking in aluminum pots, why would you want aluminum-flavored sauce? Eww.

