If you haven’t seen it, you should start with Part I of this four-part series.
How I make 4 medium size Sourdough Loaves
Part I
- The Introduction
- The Overview
- The Ingredients and The Utensils
Part II
- Wake up the wee yeast beasties
- The Sour in Sourdough
- Flour Power
- Be Honest but Autolyse
Part III
Part IV
- Into the Loaf Pans
- The Last Rise Before The Heat is On
- How Cool is This
Make it Slick
During the 20 minutes for autolyzing, I grease up the proofing bowls, the loaf pans and one side of two wax paper sheets with Crisco® shortening. [Editor’s note: Crisco still isn’t food. Choose lard.]
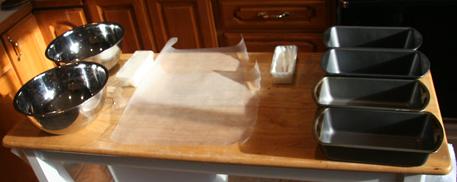
After everything is greased, I set up a kneading board, although no actual kneading will be done on the board, only forming. You could say forming was a form of kneading, and you could say you need to form, but I won’t. A terry cloth towel keeps the board stationary on the kitchen table. [Note: If the board is still sliding around, trying making the towel slightly damp. Or get a piece of rubberized shelf liner just for keeping your cutting board still.] The flour is stored in a vacuum canister.
Important: Do not use marble for the kneading board. The thing that makes marble great for pie crusts — keeping the dough cool — will chill the dough and annoy the wee beasties.
2nd batch note: I also premeasure yeast, sugar, salt and flour for the second batch here.
The Need to Knead

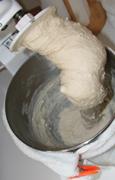
After twenty minutes, the bread is ready for kneading. I don’t worry about kneading very much as two minutes in the stand mixer has never failed.


Now I get the kneaded dough off the dough hook and out of the stand mixer bowl onto the kneading board. Make sure the kneading board is well floured, the dough is very sticky. A spatula/scraper from my Cuisinart® food processor is the best tool that I’ve found for doing this.


2nd batch note: I put the stand mixer bowl in the sink, put in the dough hook and fill with hot water.
The Rise of The Wee Yeasties
Now to form the dough into a ball. I gently grip the dough with cupped hands as Allstate Insurance used to do. I gently close my hands like a clam shell closing, and turn the ball now forming slightly. This should be gentle and not too quick, no need for speed or to over knead. This is different from non-sourdough breads.
Only one hand shown here as the camera is in the other hand.


Now into the proofing bowl and cover with greased wax paper.


Key Idea: The temperature of proofing is key to good flavor in the finished bread. 85°F (29°C.) is ideal but 2-3° F. (1-2°C.) below that is acceptable, not to put too fine an edge on it. The idea is to balance the activity of yeasts and lactobacilli.
Check the thermostats and into the proofing box.


A 2nd Batch for Hungry Friends
On to batch two
Using the plastic scrub to clean out the remaining dough from the stand, then starting on batch two.
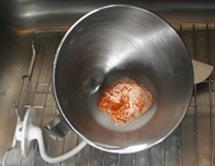

Second verse, same as the first.